Imagine you’re sweeping the kitchen floor and notice a small pile of what looks like sawdust near the baseboards. Or perhaps you walk into your living room on a warm spring evening to find dozens of discarded, translucent wings scattered across the windowsill. Your heart sinks. You know it’s one of two notorious wood-destroying insects, but which one?
When it comes to carpenter ants vs termites, misidentifying the culprit isn’t just a biology mistake—it’s a financial hazard. Confusing the two can lead to delayed treatment, allowing a localized issue to balloon into a structural nightmare. The stakes are incredibly high: the average cost to repair termite damage in the U.S. ranges from $3,000 to $7,000 (and can easily exceed $10,000 for severe structural compromises), while carpenter ant repairs typically range from $500 to $2,500 depending on the extent of the nesting.
In this comprehensive guide, we will show you exactly how to tell the difference between carpenter ants and termites, outline the distinct visual cues and termite signs vs. carpenter ant signs, and provide a practical DIY inspection checklist. Whether you’re a new homeowner, a seasoned DIYer, or a property manager, you’ll learn how to protect your biggest investment and know exactly when to call in the cavalry.
The Quick Comparison: Carpenter Ants vs. Termites at a Glance
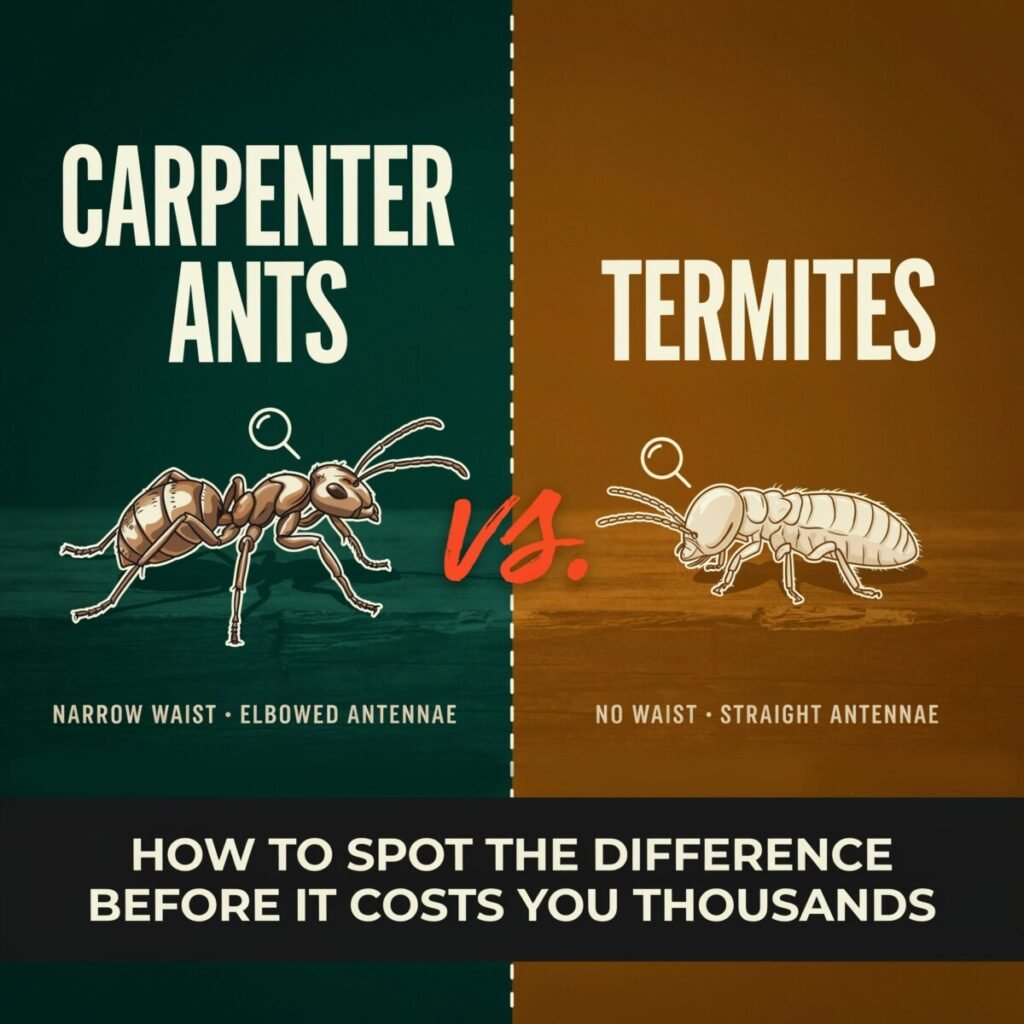
If you have a specimen in a jar or you’re trying to remember the key differences while inspecting your crawlspace, here is a rapid-fire breakdown of the physical and behavioral differences between these two pests:
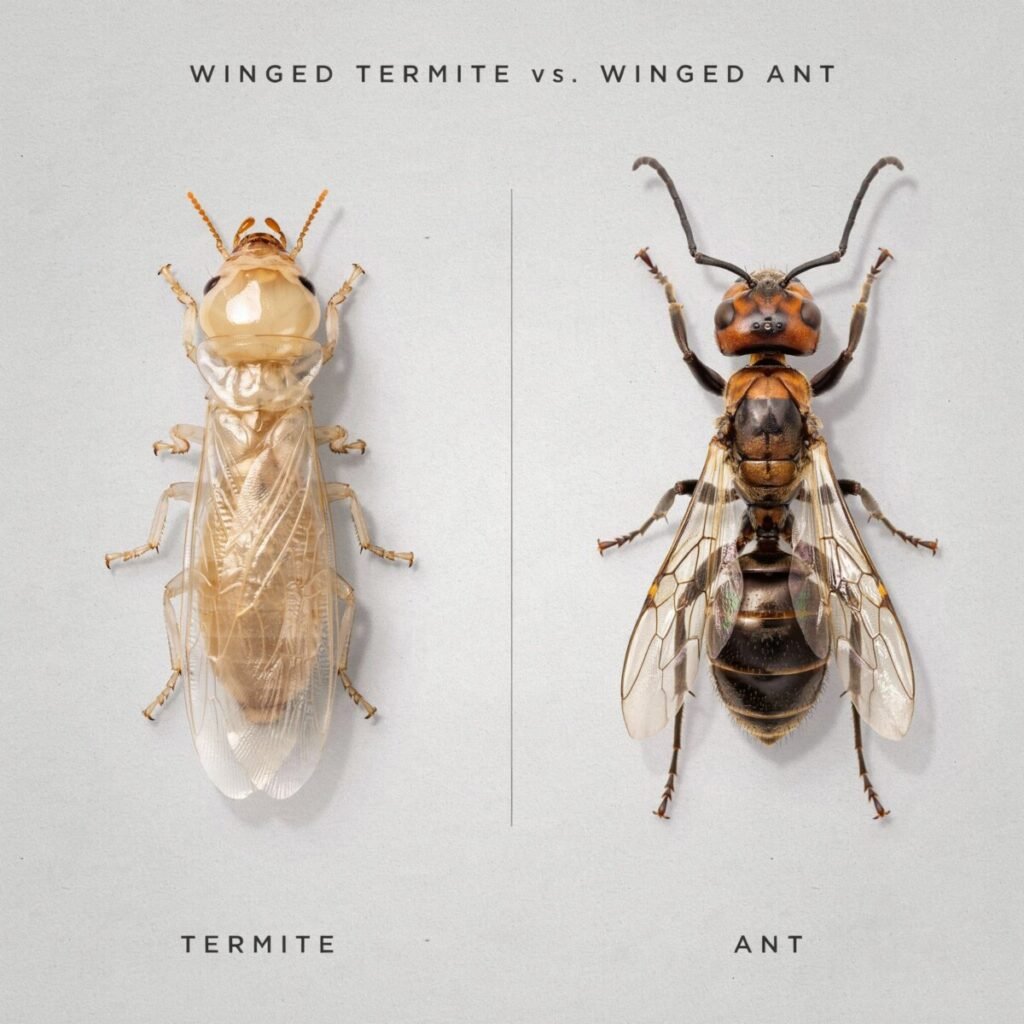
- Body Shape: Carpenter ants have a distinctly pinched, constricted “waist” (petiole). Termites have a broad, uniform, “straight-sided” body with no visible waist.
- Antennae: Ant antennae are “elbowed” or bent. Termite antennae are straight and look like a string of tiny beads.
- Wings (Alates): Both produce winged swarmers, but termite alates have two pairs of wings that are equal in length and much longer than their body. Ant swarmers have hind wings that are noticeably shorter than their front wings.
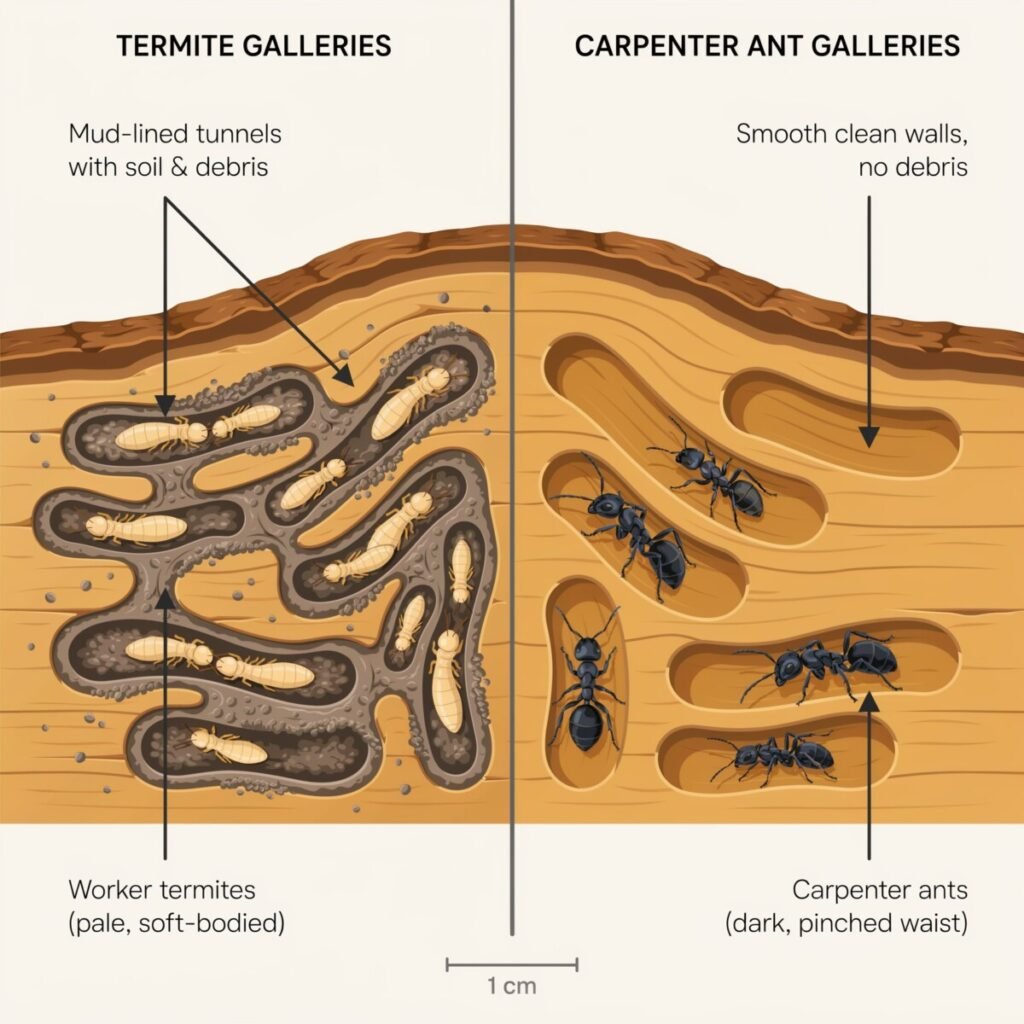
- Diet & Damage: Termites consume wood for nutrition (cellulose), leaving rough, honeycomb-like galleries packed with soil. Carpenter ants do not eat wood; they excavate it to build nests, leaving smooth, clean tunnels.
- Signs Left Behind: Termite signs often include mud tubes on foundations and soil in wood galleries. Carpenter ant signs include piles of “frass” (sawdust-like debris) pushed out of nesting sites.
- Moisture Association: While both love moisture, carpenter ants almost always target wood that is already water-damaged or decaying. Subterranean termites require moisture but will happily invade sound, dry wood if they can maintain a connection to the soil.
How to Identify Each Pest
Knowing what you are looking for is half the battle. Let’s break down the specific identification markers, nesting habits, and behaviors of both insects.
Identifying Carpenter Ants
Carpenter ants (Camponotus species) are among the largest ants you will encounter in the U.S. They are typically black, red, or a combination of both, and range from 1/4 to 1/2 inch in length.
Behavior and Nesting Habits:
Unlike termites, carpenter ants are relatively easy to spot because they forage for food (sweets, proteins, and other insects) in the open. You might see a distinct foraging trail of large black ants marching across your kitchen counter or along the exterior siding of your home at dusk. Inside the walls, large colonies can actually be heard; they make a distinct, dry rustling sound that some liken to crinkling cellophane.
Carpenter Ant Signs:
The most definitive carpenter ant sign is the presence of frass. Because they don’t eat the wood, they must push the excavated debris out of their nesting galleries. This frass looks like coarse sawdust mixed with tiny, dead insect parts. You will often find these piles beneath baseboards, window sills, or in basement rim joists.
Identifying Termites
Termites are notoriously secretive. You can have a massive colony of hundreds of thousands of individuals destroying your home’s framing for years without ever seeing a single bug. In the U.S., the most common culprits are subterranean termites, drywood termites, and dampwood termites.
Workers are pale, almost translucent, and about 1/8 inch long. Because they dry out and die quickly when exposed to air and light, they stay hidden inside the wood or within their protective mud tunnels.
Termite Signs:
The most glaring termite signs are mud tubes. Subterranean termites build these pencil-sized tunnels of soil, saliva, and feces to travel safely between their underground colonies and the wood in your home. You’ll typically spot them climbing up foundation walls, piers, or utility penetrations in the crawlspace. Another major sign is the presence of discarded wings. When termite alates swarm to start new colonies, they shed their wings shortly after landing, leaving piles of identical, translucent wings near windows and doors.
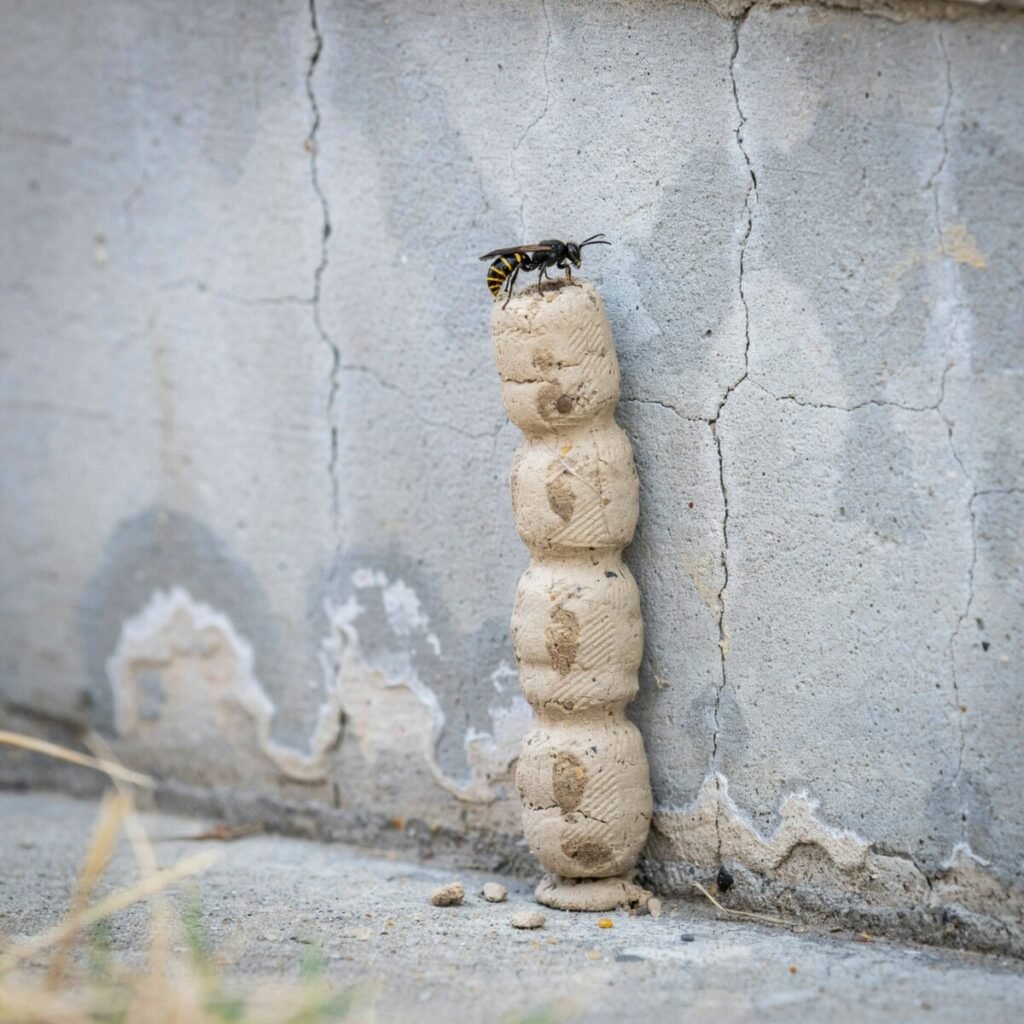
Termite vs. Ant Damage: Patterns and Why They Matter
Understanding termite vs ant damage is crucial for assessing the severity of an infestation and the urgency of the repair.
Termite Damage: The Silent Eaters
Termites eat cellulose, the primary component of wood. As they consume the wood, they create extensive, honeycomb-like galleries. Because subterranean termites live in the soil, they pack these galleries with dirt and feces to maintain the high humidity they need to survive. If you were to slice open a termite-infested beam, the wood would look layered, soil-packed, and severely compromised.
Because they eat the wood from the inside out and avoid the surface, termite damage is often entirely hidden behind drywall or paint until a structural failure occurs. The colony size of a mature subterranean termite nest can reach into the millions, meaning the rate of consumption is rapid and relentless.
Carpenter Ant Damage: The Excavators
Carpenter ants do not digest wood. They simply chew through it to create smooth, clean nesting galleries. If you look at carpenter ant damage, the wood will look almost polished or sandpapered inside. They prefer to start nesting in wood that has been softened by moisture problems, leaks, or fungal decay.
While a localized infestation of carpenter ants might start in a leaky window frame, the colony can expand into adjacent sound structural timbers as the colony size grows. However, because they don’t consume the wood for nutrition, the overall volume of wood destroyed is generally much lower than that of a termite colony.
Real-World Cost Scenarios
- Carpenter Ant Scenario: You find frass near a basement rim joist that has been subjected to a slow plumbing leak. The ants have excavated a 3-foot section of the joist. Repair cost: Cutting out the damaged wood and sistering a new joist might cost between $200 and $1,000, plus the cost of fixing the leak and treating the ants.
- Termite Scenario: Subterranean termites have accessed the main load-bearing beam in your crawlspace via an undetected mud tube, eating through the core over three years. Repair cost: Shoring up the house, replacing the beam, and treating the soil can easily cost $3,000 to $10,000+.
DIY Checks and Immediate Steps If You Suspect an Infestation
Don’t panic, but do act quickly. If you suspect wood-destroying insects, grab a flashlight, a screwdriver, and a notepad. Here is your step-by-step pest inspection checklist:
- Look for Swarms and Wings: Check windowsills, door frames, and spider webs near light sources for discarded wings or dead swarmers.
- Hunt for Mud Tubes: Inspect the exterior foundation, crawlspace piers, and basement walls. Break open any suspicious mud tubes; if it’s active, you may see tiny, pale worker termites inside.
- Probe Suspect Wood: Take a flathead screwdriver or an awl and gently tap and probe baseboards, window sills, and door frames. Wood that sounds hollow or easily pierces with light pressure is a major red flag. (Caution: Do not aggressively stab load-bearing beams, as this can worsen structural weakness).
- Search for Frass: Look for coarse sawdust piles near baseboards, in the attic near the eaves, or on the ground beneath exterior porches and deck posts.
- Follow the Ants: If you see large ants, do not spray them immediately. Watch them. Foraging trails will often lead you directly to the satellite nest or the entry point into the wall void.
- Check Moisture Sources: Inspect under sinks, around water heaters, and near AC condensation lines. Moisture is the primary catalyst for carpenter ant infestations.
Immediate Actions to Take
- For Carpenter Ants: You can attempt do-it-yourself pest control using specialized carpenter ant bait traps. The foraging ants will carry the slow-acting poison back to the nest, eventually eliminating the queen. Avoid using over-the-counter aerosol sprays (like standard bug bombs), as these will only scatter the colony deeper into your walls.
- For Termites: Stop. Do not attempt DIY termite treatments. Disturbing the mud tubes or spraying visible termites will cause the colony to simply reroute and find a hidden entry point, obscuring the evidence a professional needs to properly treat the home.
- Document Everything: Take clear photos of the damage, mud tubes, or frass. Collect samples of wings or frass in a ziplock bag. Note the date and time you saw any swarms.
Prevention Strategies: Keeping Them Out
Preventative pest control is infinitely cheaper than structural repairs. Both of these pests are opportunistic, looking for easy access to wood and water. Implement this home maintenance checklist to fortify your property:
Moisture and Wood Control
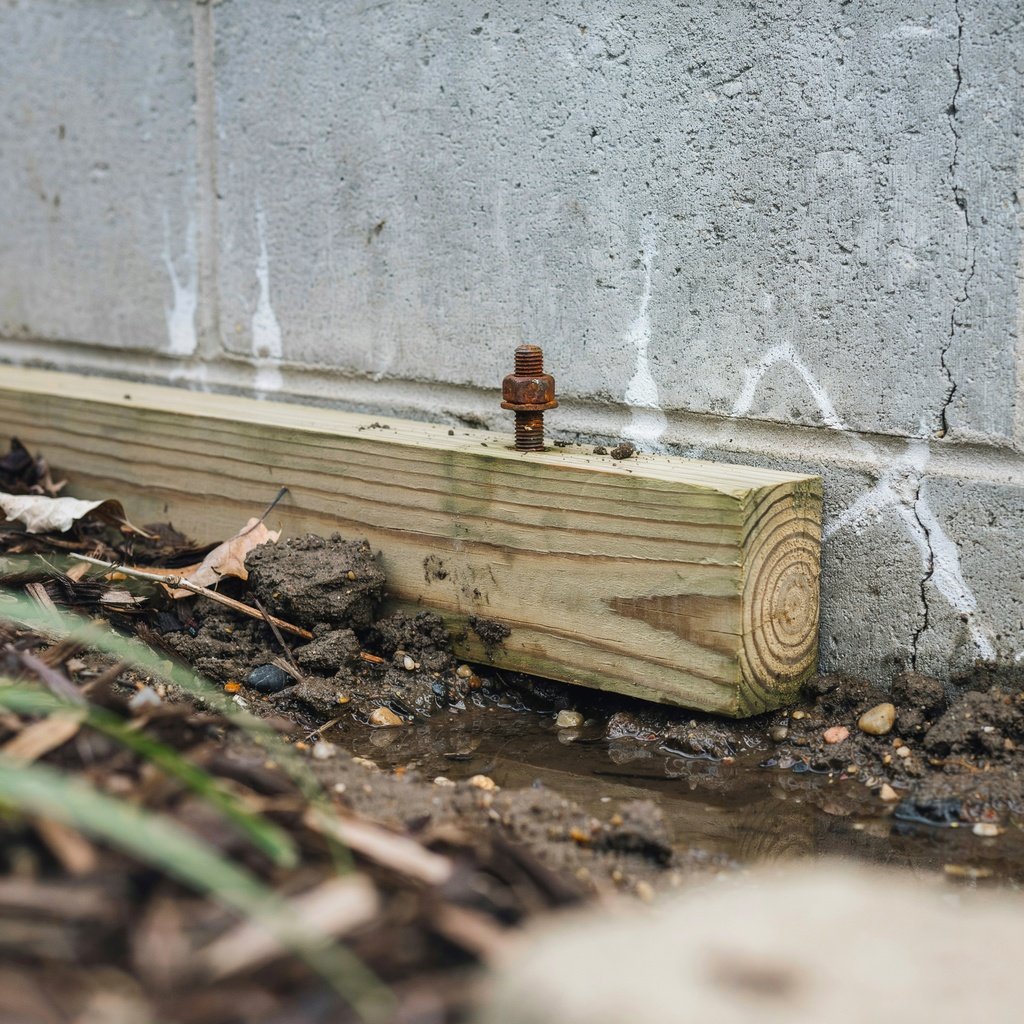
- Eliminate Wood-to-Soil Contact: This is the #1 rule of termite prevention. Wooden fence posts, deck stairs, and siding should never touch the dirt. Maintain at least a 6-inch gap between the soil and any wood siding or structural framing.
- Store Firewood Properly: Keep firewood, lumber, and mulch piles at least 20 feet away from your home’s foundation. Bringing firewood inside during the winter is a common way homeowners accidentally introduce carpenter ant queens into their living spaces.
- Fix Leaks Promptly: Repair dripping outdoor faucets, leaky pipes, and poorly ventilated bathrooms. Replace any water-damaged wood immediately before it becomes a target.
Landscaping and Exterior Maintenance
- Manage Mulch: While mulch is great for plants, it retains moisture and provides a hidden highway for termites. Keep mulch thin and at least 12 inches away from your foundation. Consider using gravel or crushed rock near the base of the house.
- Trim Vegetation: Cut back tree branches and shrubs so they do not touch your roof or siding. Carpenter ants frequently use branches as “bridges” to bypass exterior treatments and access your attic or eaves.
- Maintain Gutters: Ensure gutters are clean and downspouts direct water at least 4 feet away from your foundation to prevent soil saturation and wood rot.
When to Consider Professional Preventative Treatments
If you live in a high-risk termite zone (like the Southeast or coastal California), consider installing a professional termite bait station system or a liquid soil barrier around your perimeter. For new builds, ensure the builder applies a pre-construction termiticide treatment to the soil before the slab is poured.
When to Call a Professional Exterminator
While DIY methods can manage minor carpenter ant foraging, wood-destroying insects often require professional intervention. You should immediately call a professional exterminator if you notice:
- Visible mud tubes on your foundation or in the crawlspace.
- Swarms of winged insects emerging from inside your walls or baseboards.
- Hollow-sounding structural beams, sagging floors, or stuck doors/windows (which indicate the framing has warped due to internal damage).
- Recurring carpenter ant sightings despite your best DIY baiting efforts.
What Professionals Bring to the Table
A licensed pest control expert has access to commercial-grade termiticides, advanced baiting systems, and tools like thermal imaging cameras and moisture meters to detect hidden nests behind drywall. Furthermore, professional treatments come with warranties and annual renewal agreements, which are often required by mortgage lenders and are highly valuable during real estate transactions.
Vetting Tips: Always verify the company’s state licensing and insurance. Ask for references, request a detailed, written treatment plan that specifies the chemicals used, and always get at least three quotes to compare pricing and warranty terms.
Localizing Your Pest Strategy and Additional Resources
Pest pressure varies wildly across the United States.
- The Humid Southeast: High pressure for aggressive Formosan and Eastern Subterranean termites. Annual professional inspections are virtually mandatory here.
- The Dry West & Southwest: Drywood termites are a major threat. Unlike subterranean termites, they don’t need soil contact and can infest attic framing or furniture. Whole-house fumigation is sometimes required here.
- The Pacific Northwest: Dampwood termites and massive carpenter ant colonies thrive in the wet, forested environments. Moisture control is your absolute best defense.
To get hyper-local advice, contact your local county extension office or state university agricultural department. They offer free, region-specific guides on local pest species and safe treatment protocols.
Ready to protect your home?
Don’t wait until the damage is done. Download our free, printable Home Pest-Inspection Checklist below, or [Link: Contact a local pest control professional] to schedule your annual WDO (Wood Destroying Organism) inspection today!
Quick Facts & Cost Cheat Sheet
🔍 The 3-Second ID Cheat Sheet:
- Check the Waist: Pinched = Ant. Thick/Straight = Termite.
- Check the Wings: Unequal lengths = Ant. Equal, long wings = Termite.
- Check the Debris: Sawdust (Frass) = Ant. Mud tubes/Soil = Termite.
💰 Average U.S. Cost Ranges:
- Termite Damage Repair: $3,000 – $10,000+
- Carpenter Ant Damage Repair: $200 – $2,500
- Professional WDO Inspection: $75 – $300
- Whole-House Termite Treatment: $500 – $2,500
📅 High-Risk Swarm Months:
- Subterranean Termites: Spring (March – May)
- Drywood Termites: Late Summer / Fall (August – November)
- Carpenter Ants: Spring and early Summer (May – July)
Frequently Asked Questions (FAQ Schema Block)
Q: How do I know if I have termites or carpenter ants?
A: The easiest way to tell is by looking at the debris they leave behind. Carpenter ants push out piles of coarse sawdust (frass) and dead insect parts. Termites leave behind mud tubes on foundations and pack soil into the wood they consume. Additionally, termite swarmers have straight bodies and equal-length wings, while ant swarmers have pinched waists and unequal wings.
Q: Do carpenter ants eat wood like termites do?
A: No. Carpenter ants do not eat wood for nutrition; they simply chew through it to excavate smooth tunnels for their nests. Termites actually consume the wood cellulose for food, which is why termite damage tends to be more widespread and structurally devastating.
Q: Can I treat termites myself?
A: It is highly discouraged. DIY termite treatments rarely reach the deep underground colony, and disturbing visible termites can cause them to reroute into hidden areas of your home. Always hire a licensed professional for termite remediation.
Editorial Notes for Publishing:
- Ensure all image placeholders are replaced with high-quality, properly licensed photos.
- Add the FAQ Schema markup (JSON-LD) to the
<head>or footer of the post using the Q&A provided above. - Link the bracketed text
[Link: Contact a local pest control professional]to your primary service or contact page. - Internal Link Opportunities: Link “moisture problems” to your [Home Maintenance Checklist], and “crawlspace” to your [Attic and Crawlspace Inspection Guide].
- External Link Opportunities: Link “county extension office” to the USDA NIFA extension directory, and “wood-destroying insects” to the NPMA (National Pest Management Association) termite resource page.
📋Home Pest-Inspection Checklist
(You can format this as a downloadable PDF or a visually distinct graphic for the blog post).
🏠 The Homeowner’s WDO (Wood-Destroying Organism) Inspection Checklist
Print this out and perform this check every Spring and Fall!
Exterior & Foundation
- [ ] Inspect foundation walls for pencil-sized mud tubes.
- [ ] Ensure all soil and mulch is at least 6 inches below wooden siding.
- [ ] Check that deck posts, porch stairs, and fence posts are not buried in soil.
- [ ] Trim tree branches and shrubs at least 3 feet away from the roof and siding.
- [ ] Verify gutters are clear and downspouts direct water away from the foundation.
Interior & Crawlspace/Basement
- [ ] Look for piles of “sawdust” (frass) under baseboards, windows, and in the attic.
- [ ] Check windowsills and door frames for piles of discarded, translucent wings.
- [ ] Tap wooden baseboards and window sills; listen for a hollow sound.
- [ ] Inspect the rim joist and subflooring in the basement/crawlspace for moisture or soft wood.
- [ ] Check under all sinks and around the water heater for plumbing leaks.
- [ ] Ensure attic and crawlspace vents are unblocked to allow proper airflow.
Action Items:
Found mud tubes or hollow wood? ➔ Call a licensed termite professional immediately.
Found sawdust/frass or trailing ants? ➔ Set carpenter ant bait stations and fix the nearest water leak.